This and the next series of posts on Redbubble will together constitute a deep dive into almost every aspect of the site. For the sake of keeping the blog posts’ lengths in the realm of “digestible chunks,” I’ll first just start with the information I tend to rapid-fire at people when they mention they’d like to open a Redbubble store (I’ve helped three people get set up).
In my opinion, Redbubble has the best uploader of any print-on-demand site. It takes one “main image” that you upload and auto-enables it on 65 products. You can then easily go in and “turn off” certain products, adjust how your image looks on individual items, and use a built in tiling feature to create grid or offset grid patterns from your image if you so choose. However, before you get in to playing with all those features (and many others that are available), there is a key piece of information that you need that is very hard to find.
In order to get your images to enable on all 65 products automatically, they need to be a certain size: 13500 x 11462 pixels. The wall tapestries are what makes that the necessary size. They’re the biggest product, and that’s their minimum set of dimensions for full coverage. If you use a smaller size, you’re likely to get tiny boxes with your image in the center of some of your items like I initially did. My friend Ethan thought he was going to have to find a whole new website to sell wall tapestries because he couldn’t figure out what the proper size was – like I said, not super available information.
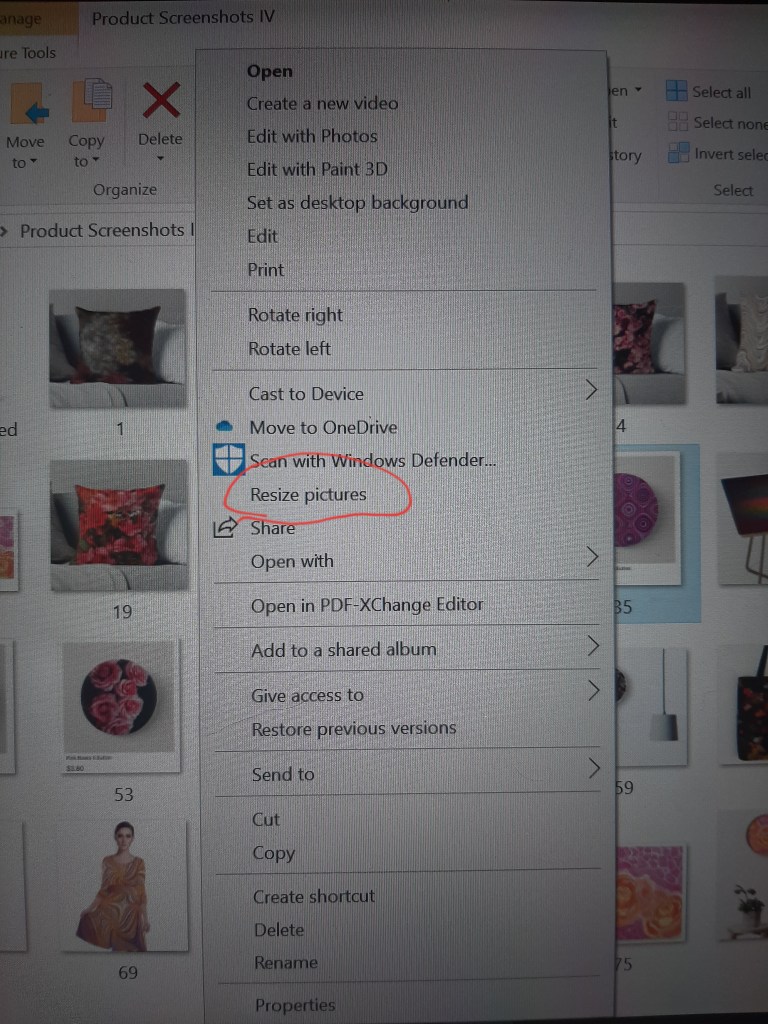
Now here’s the next somewhat tricky part: Most laptops do not have a built in image resizer, and scanned images and uploaded photographs are not automatically going to be in that size. What you need is an extension for image resizing, and I use Image Resizer for Windows (available here: https://www.bricelam.net/ImageResizer/ ). It’s completely free to download and use. Once you download it and install the application, you should see the option to resize any image in your gallery that you right click on. Here’s a picture:
Before you download the application, that option will not be there. Once you click it, a box opens that will give you four preset sizes you can choose from and an option to type your dimensions into a custom box at the bottom. Use that to resize your image to 13500 x 11462:
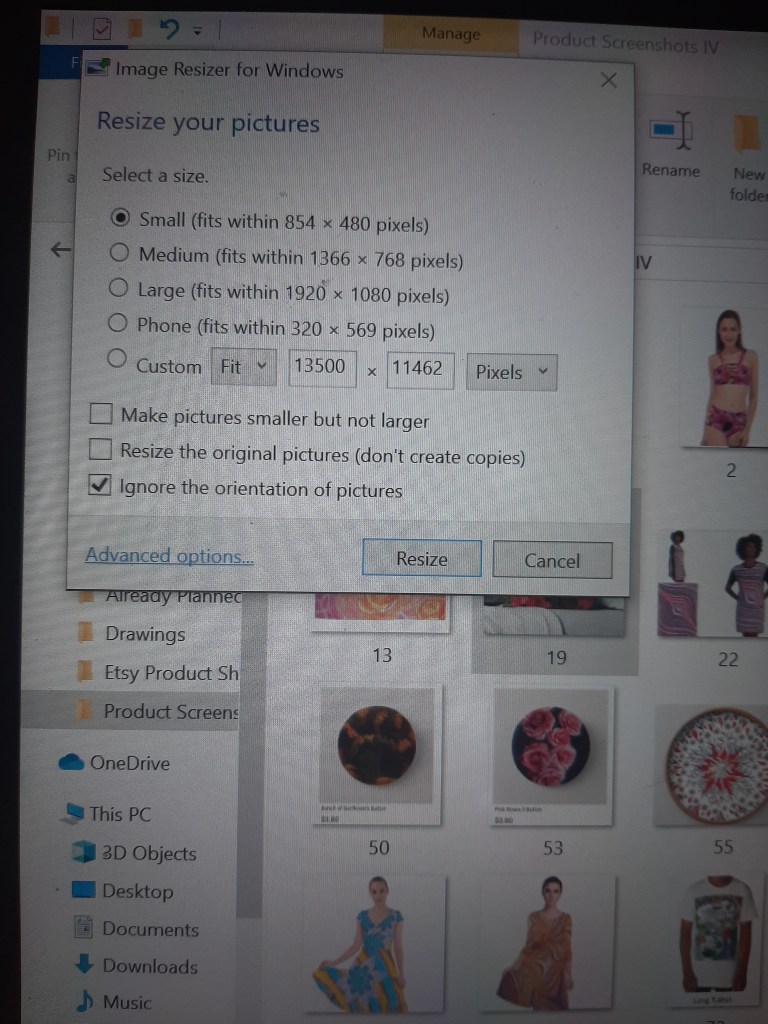
The settings above should resize your image to work on all Redbubble products (just select the custom option instead of the “small” option like I have in the picture). After you click “Resize,” the new image should appear right next to the old one but with “(Custom)” added after the original title. That is the file you should select and upload to Redbubble.
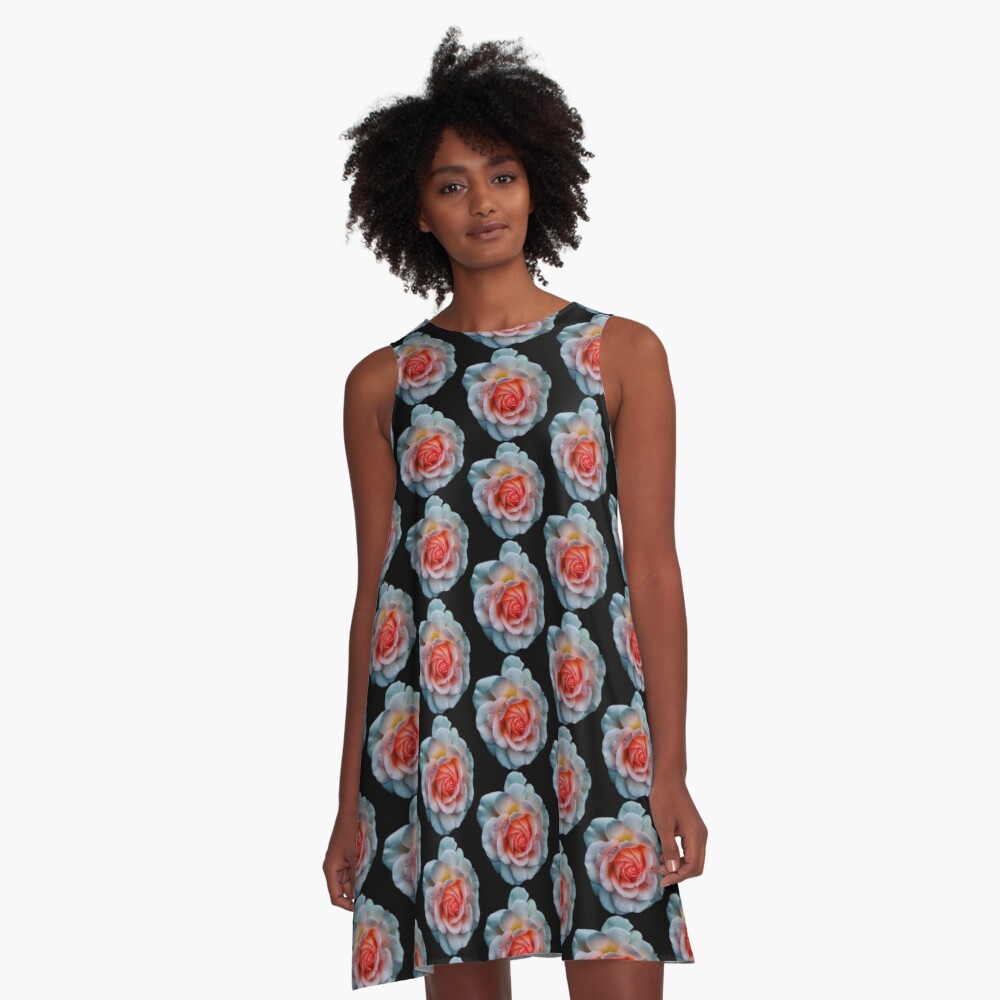
Now that’s enough to get your uploaded designs looking nice and covering all the products. After you upload a “main image” you can also click on products and upload different images/adjust the uploaded image individually if you need to. One instance where you might want to do this is if you have a transparent “logo-type” image that you want to upload to T-shirts while you want the main image to be an all-over print:

Above is my “Favorite Rose” design, and as you can see, I uploaded a “cut-out” image of the rose for the T-shirts, but left the original photo as an all-over print for device cases. If you are using a cut-out image as your main image, you can also choose a background color (either for all products in the menu underneath the main image upload space or for individual ones by clicking the product, then selecting a background color). Example:
I also have my Favorite Rose design uploaded separately as “Favorite Rose Repeating” where I only use the cut-out image + the offset grid function and a black background. P.S. I cut out the image using a phone app called PicsArt (it has a function called “free crop,” and I traced out the whole rose with my finger to get that image).
The last thing you need to know before you start uploading products is that you absolutely need to include your shop name and your actual name in the tags of your designs (you get to choose up to 50 tags and the title when you upload an image). I’ll explain more on why in the next post, but believe me, it’s super important to make your work “findable.”
Links to my own products featured above:
Favorite Rose (scroll down to see products): https://www.redbubble.com/people/oliviahathaway/works/34090981-favorite-rose?asc=u&c=972523-queen-marys-rose-garden
Favorite Rose Repeating A-Line Dress: https://www.redbubble.com/people/oliviahathaway/works/42343685-favorite-rose-repeating?asc=u&c=972523-queen-marys-rose-garden&p=a-line-dress&rel=carousel
